Supported image formats
Memento Yearbook supports jpg, heic and png file types. Generally, jpg and heic should be used for photos and backgrounds. Since png files support transparency, they are used primarily for clipart embellishments. The maximum image file size is 20 megabytes.
Photo management permissions
Not all team members may have permission to manage albums and photos - Editors/Editors-in-Chief may create albums, but Staffers need to be given permission to do so. Learn more about Team Management.
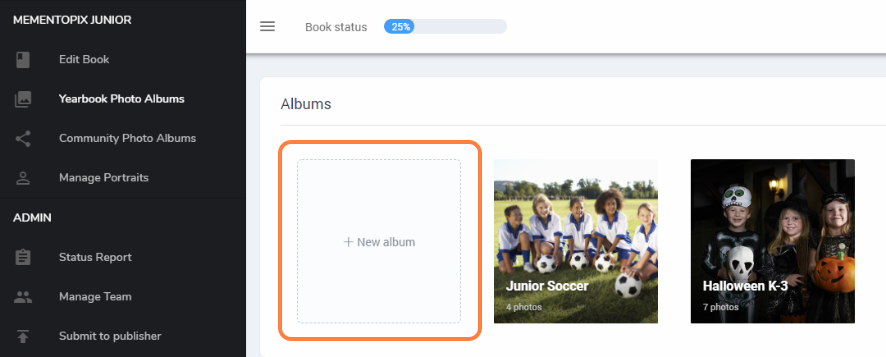
Creating an album
Yearbook Photo Albums organize and store candid photos -- but not portrait images -- that will be used directly in the Editor to build your pages.
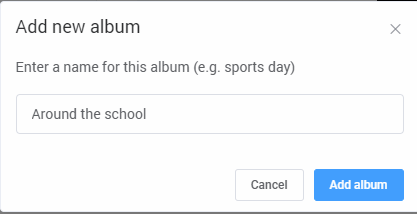
To create an album, click on Yearbook Photo Albums on the left-side menu, then click on + New Album then type in the album name. Click Add Album to complete setup. The new album will appear as a blank tile, ready for you to add photos.
Adding photos to albums
Click on a Yearbook Photo Album to open it.
On the top menu bar, choose the upload location: a Google Drive or your computer's local drive.
To import images from your local drive, navigate to the folder containing your photos, then select one or more photos.
- To select all photos in the folder, select one image, then type Ctrl-A (Windows) or Cmd-A (Mac).
- To select multiple photos, select one image, then hold the Ctrl-key (Windows) or Shift-key (Mac), and click on additional images, one at a time.
Click Open to start the upload.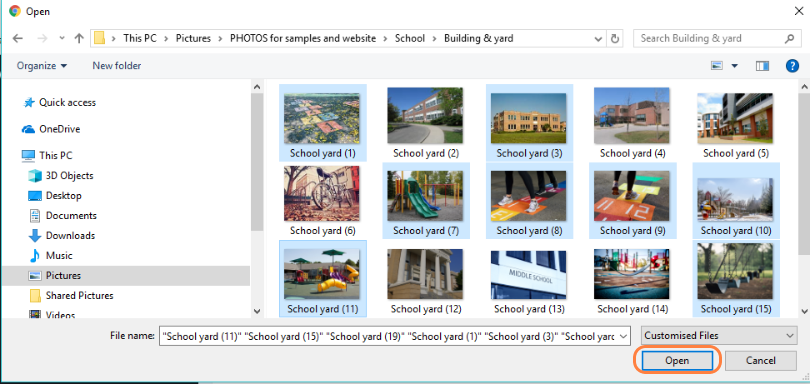
To import images from a Google drive, login and authorize access to your selected drive.
- choose a folder

- Select one or more image within a folder. Click select to start the upload. After uploading, reopen the drive to add more images in a different folder, click on the links at the top of the page. (Note: image previews are not available in Google drive.)

Uploads should proceed fairly quickly, depending on the number of images, the size of the photos, and the speed of your internet connection. When the upload is complete, large previews of your images will appear.

Note: You can create albums and upload photos from your local drive directly in the page editor as well.
Moving photos between albums
To move one or more photos between albums, select one or more images within an album, then click Move Photos on the top menu.

Move the selected images into an existing album or create a new album, then click Move Photos to confirm your selection. The images will disappear from the current album and reappear in the selected album.
 |  |
Deleting photos
To delete one or more images within an album, select your images, then then click Delete Photos on the top menu. Confirm by clicking Delete Photos. Important: Deleted images may not be restored.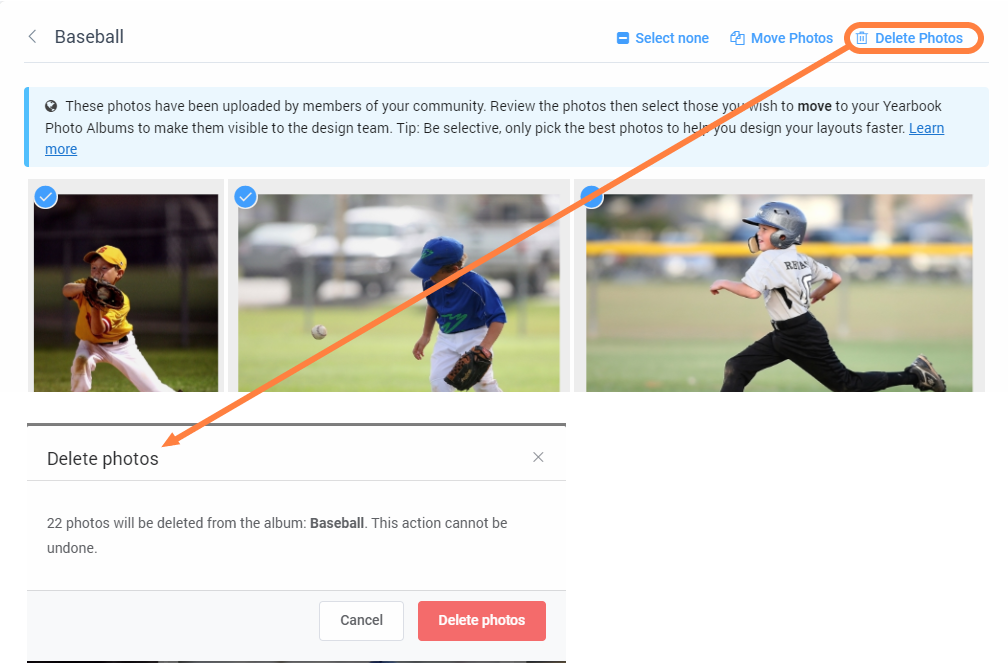
Renaming photos
To edit the name of a photo, click onto the file name, and then rename the file to update it.

Sorting photos in an album
Click on the album's top right menu icon to access display and sorting options.
- show/hide the file names
- show only the photos that you uploaded
- sort the photos by file name or their upload date
- display the images in ascending (A-Z, first to last) or descending (Z-A, last to first) order.

Renaming an album
The Editor-in-Chief and Editors may Rename albums. Hover over an album to select it, then cick on the menu icon in the top right corner of the album. Choose Rename. Give the album a new name and confirm your choice to rename the album.
 |  |
Deleting a Yearbook Album
To delete an album, hover over it to select it, click on the menu icon on in the top right corner of the album tile. Choose Delete, then confirm your choice. The album and its contents will disappear. Be careful - once deleted, your album and any photos within it will be permanently deleted and cannot be restored by any means!
 |  |
Managing albums & photos in the page editor
Yearbook Photo Albums are accessed in the page editor when designing pages. Create new albums and upload images directly in the page editor. Other album and photo management actions must be done in the Yearbook Photo Albums tab directly.
Click +New Album to create a new Yearbook Photo Album.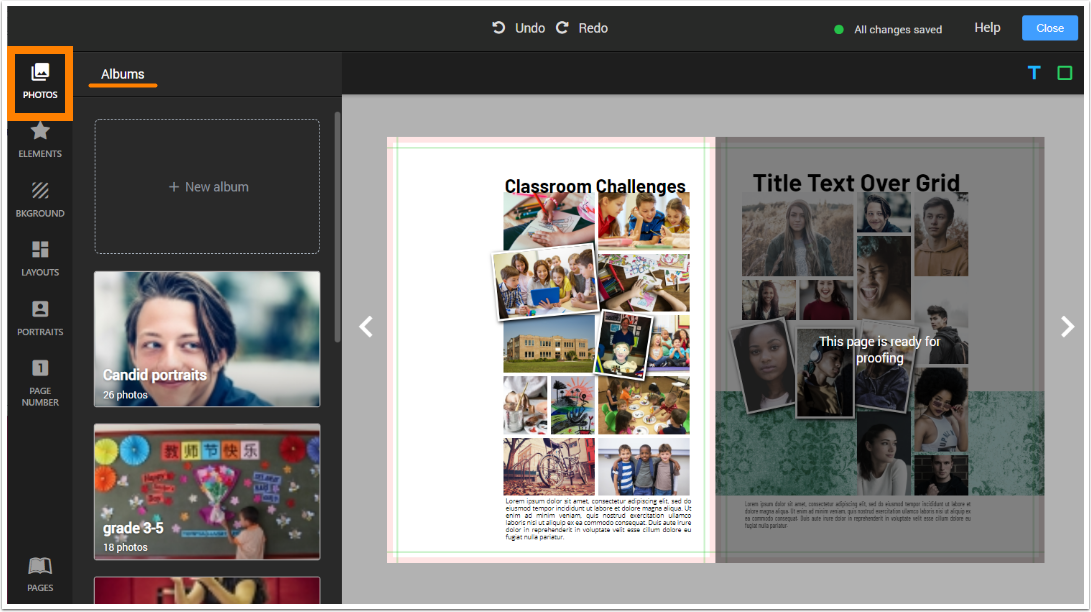
Click into any album to upload photos into it.
File names are displayed under each photo under the Photos tab. Click on the menu icon next to the album name to display sorting and display options.
 The search box enables you to look for photos using words in their filename. You can search all albums or only photos within a particular album
General Photo Management Tips
| PHOTO MANAGEMENT DOs | PHOTO MANAGEMENT DON’Ts |
| Create albums based on your sections or page themes. Less photos per album are easier to sort and select. | Don’t create albums for specific people or by date, or use only one album for all photos. Sorting and selection will be very difficult. |
| Upload or transfer only the best photos – ones that are good candidates for use in the book. | Don’t “camera dump” all images from an event. Weed out badly cropped, out-of-focus or redundant images to make page building a breeze. |
| Be selective when adding images to a page: fewer, better quality images tell a story. | Don’t overcrowd your page with dozens of photos – unless you include a free magnifying glass with your yearbook! |
| Assign photographers to cover events early in the season or recruit event organizers to provide images. Plan ahead to get the book done efficiently. | Avoid downloading photos from your school website, as these are often downsized to make web page loading faster. Get your photos from their photographer for best resolution. |
| Use original high quality photos take on phones an cameras. Photos should be transferred directly from the camera roll to the yearbook. | If a photo appears banded by large black areas, the image is a low quality screenshot. Get the original image to ensure good quality. |
| Include general photos taken around your school to decorate your book – the classrooms, the tech, the facilities, the grounds. Schools change over time, so document it today. | Only use images from your school community, your studio, or the Studio Source content catalogue. Do not download images found in a general web search – avoid copyright and resolution issues. |
Was this article helpful?
That’s Great!
Thank you for your feedback
Sorry! We couldn't be helpful
Thank you for your feedback
Feedback sent
We appreciate your effort and will try to fix the article