It is strongly recommended to build your cover and pages directly in your yearbook software's | ||
| Yearbook software provides preset page sizes with margins. | Yearbook software renders text sharply, unlike a flattened jpg image of text. | Yearbook software offers a shared image pool with usage counts to avoid duplicate images in your book. |
| Yearbook software warns about low-resolution images while designing pages in the editor. | Yearbook software includes community photo sharing links to make image collection easier. | Yearbook software provides team access with permissions and page assignments. |
| Yearbook software includes a book ladder to flexibly manage sections, page order and page numbering | Yearbook software provides easy portrait management and page flows. | Yearbook software does not include AI generated graphics, avoiding potential copyright issues and quality problems. |
Yearbook software enables instant access by advisers to any page design, so last minute corrections to the book take seconds with no additional logins, file rendering and image uploads required. | ||
Should you choose to design interior pages and/or covers outside of your yearbook software, follow these recommendations prior to creating your pages to avoid resolution and sizing issues with your project.
Step 1: Determine your book size & page count
Log into the Dashboard to access the "At a Glance" section of your Profile page. This area shows your assigned cover type(s) and page count. Some projects may have a hard cover and a soft cover option (perfect bound or saddle stitch).
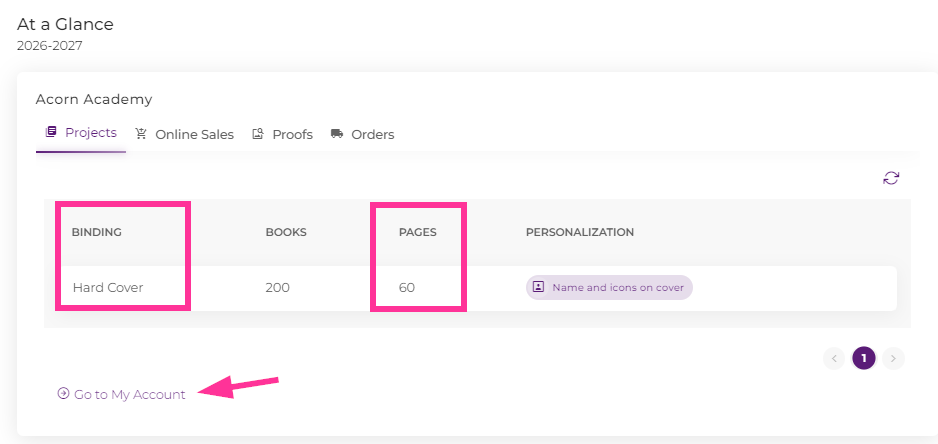
Most yearbooks are 8.5x11" but to verify your book dimensions, click on Go to My Account to see the full books specs.
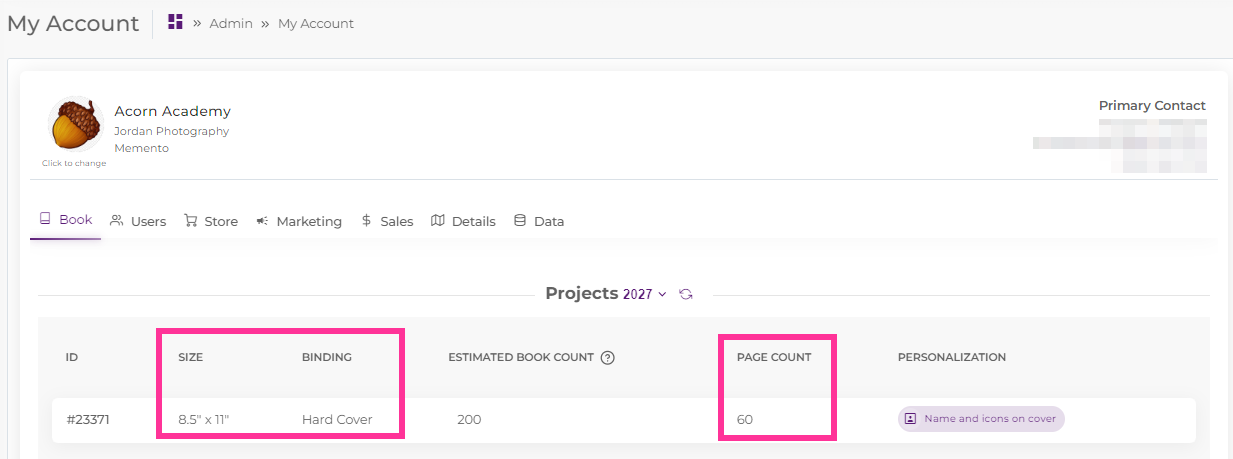
Step 2: Set your canvas sizes in your design tool
Consult the page and cover sizes article to look up your specs, then use these to set up the dimensions and margins for your canvas.
Interior pages
Design pages as a single page. Avoid double-spreads to avoid problems placing content around the gutter.
Full cover designs
If your cover includes featured images and text components, use the precise dimensions listed below to set up your cover design in your software of choice. To note: cover dimensions are based on the cover type (hard cover, soft cover perfect bound, soft cover saddle stitch), book size (8.5x11 or 9x12) and page count (which affects the spine width. Links to Adobe templates are provided whenever possible in the pages and cover size article. Avoid spine text -- this can be added in your yearbook software for better accuracy of placement and editability.
Cover backgrounds without text and feature images
If your design only includes a background texture or cover-spanning artwork which does not include feature images or text, set the canvas to 20 x 13" (6000x3900 pixels). This may be used as a full cover background or inset to the safe margins in the your yearbook software
| Hard cover design tip: Hard cover books loose at least 0.75" of the design to the wrap-over edge that flips over the backside of the cover board. Make sure that all background color/texture and banners that go from edge to edge extends into this area. All text and feature images should be kept within the safe margins (1" inset from edge). | 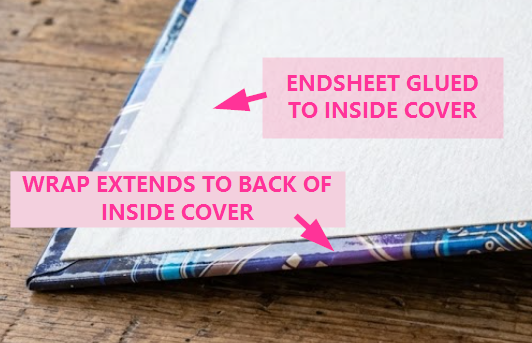 |
STEP 3: Render your design & upload to the yearbook software
1. Save/Export your design as 300 dpi JPG file.
2. Upload the JPG files to a photo album/folder in your yearbook software.
3. Ensure that there are blank pages on your ladder to receive your interior pages, if applicable.
4. Add the jpg design to cover the full canvas of your cover or interior page. Ideally, the design should be added as a background.
Canva WorkflowLog into Canva. Click Create to begin. |  | |
| 1) Choose Custom Size 2) Type the width and height of the canvas in pixels using the info above and in the pages and cover sizes article. 3) Click Create new design. | 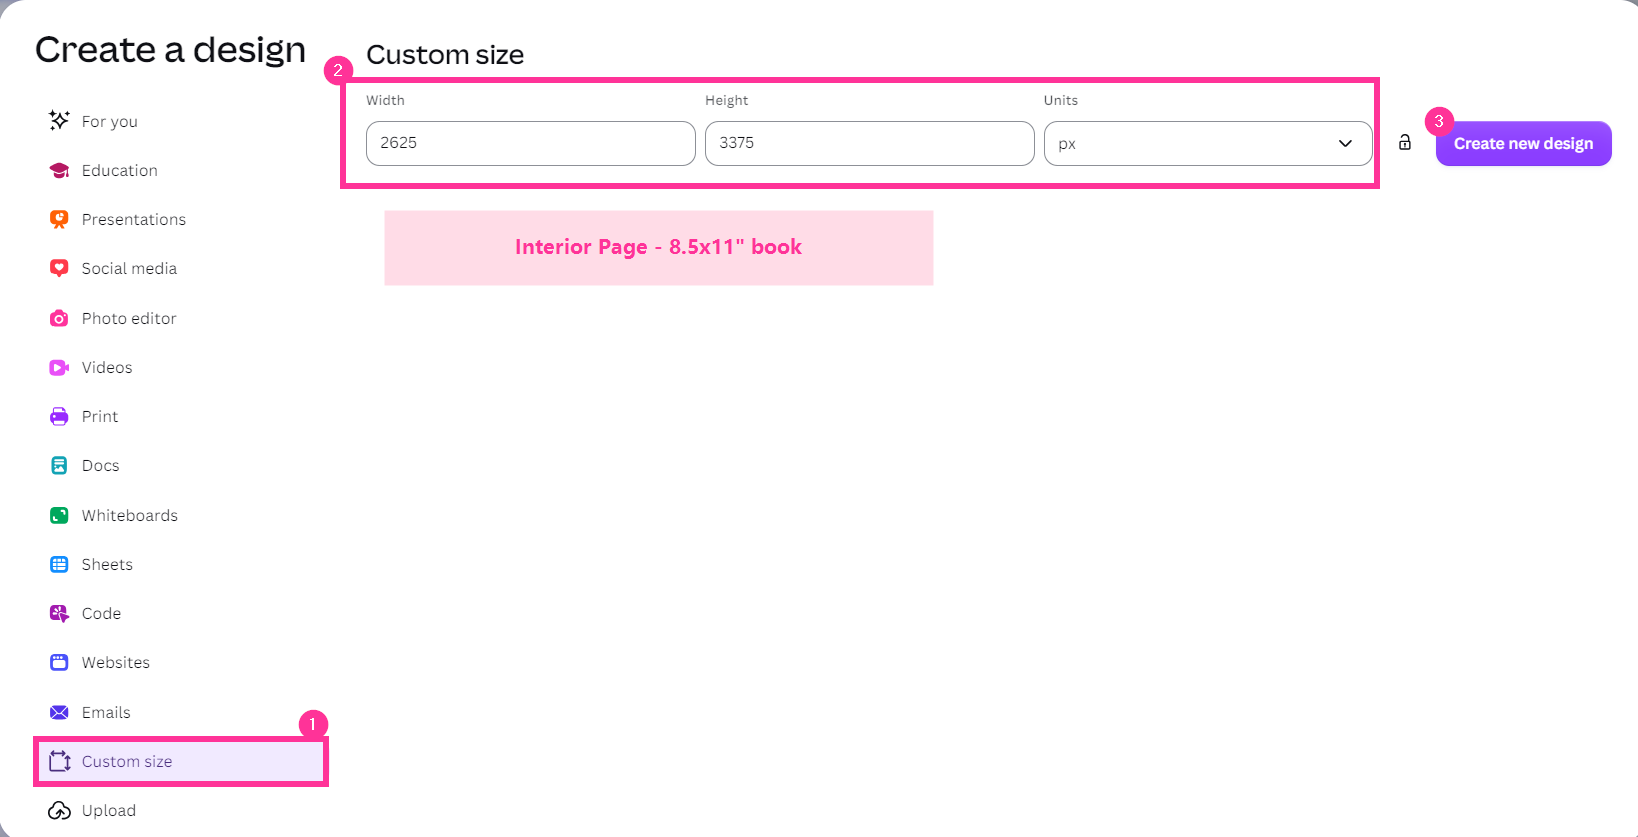 Example of an interior page for an 8.5x11. Example of an interior page for an 8.5x11. | |
| 4) When the canvas editor launches, click on File on the top menu. 5) Choose Rules and Guides. 6) Select Add guides. | 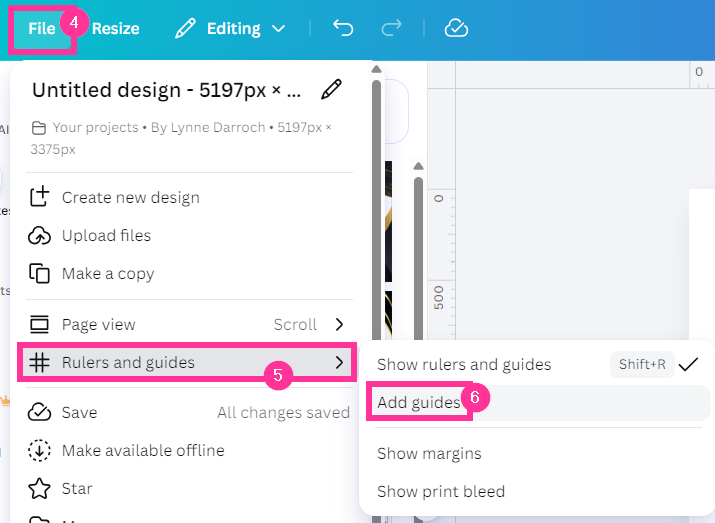 | |
Choose a Custom guide.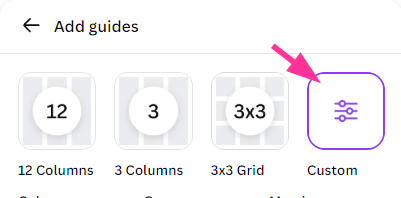 Interior page: add a margin on the column and row (150 pixels). Cover designs: add 2 columns (back & front cover), a gap (spine width) and margins as shown. | Interior page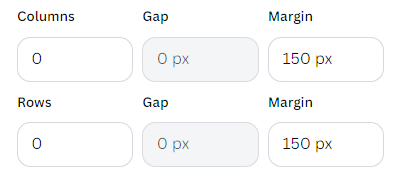 | Saddle stitch cover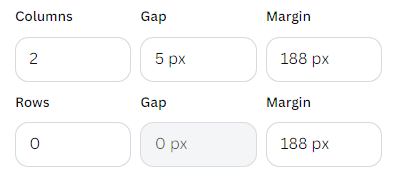 |
Hard cover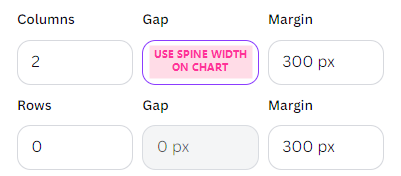 | Perfect bound cover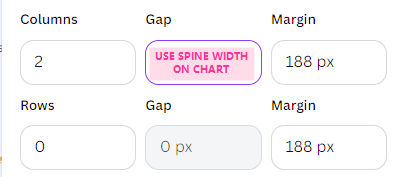 | |
| Result: The canvas displays custom margins and, if applicable, a spine region. Note: it is strongly recommended to not put spine text on in Canva. Add it directly in your yearbook software to ensure it is sized and placed correctly. Do not delineate the spine with a color band either. | Interior page with margins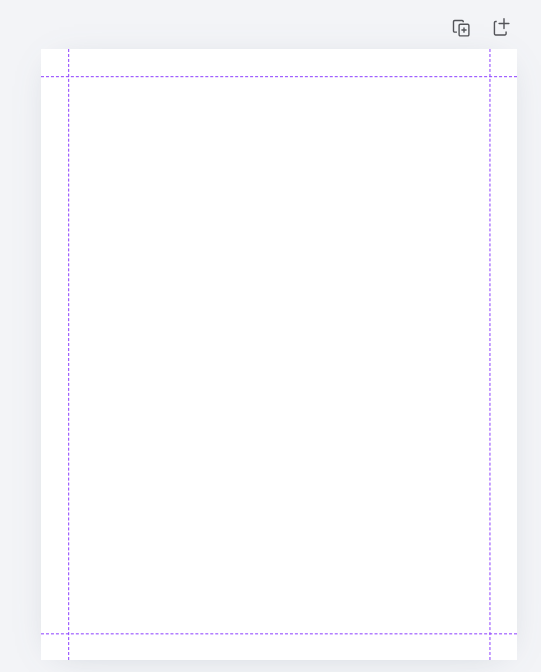 | Cover page with margins and spine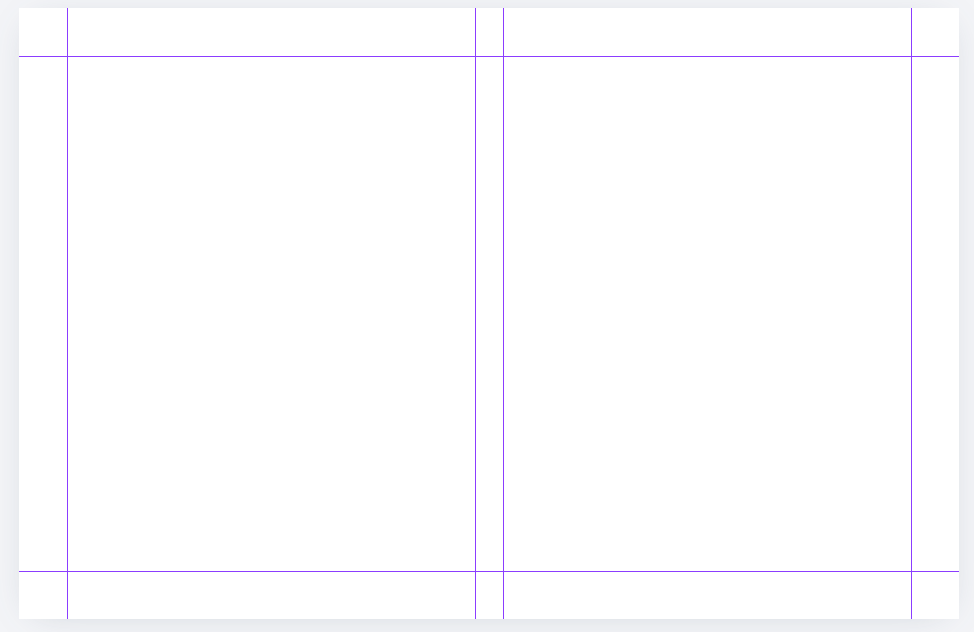 |
| When the design is completed, return to the File menu. Choose Download. | 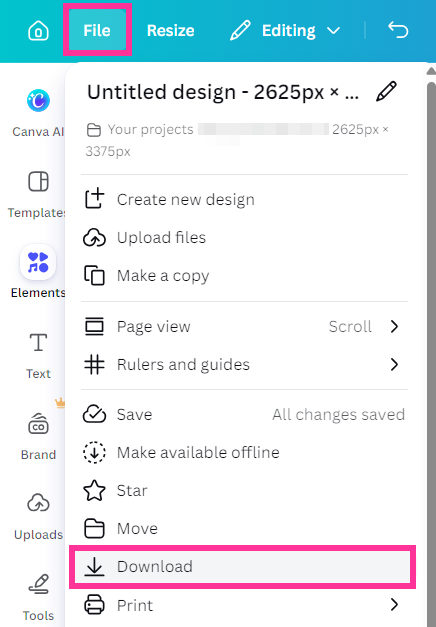 | |
| Select JPG as the file type, and verify that the size matches the expect pixel count. If possible, set the download to High. Download the file. Upload the jpg to your yearbook software, then add it to a page as a background in the yearbook software's editor. | 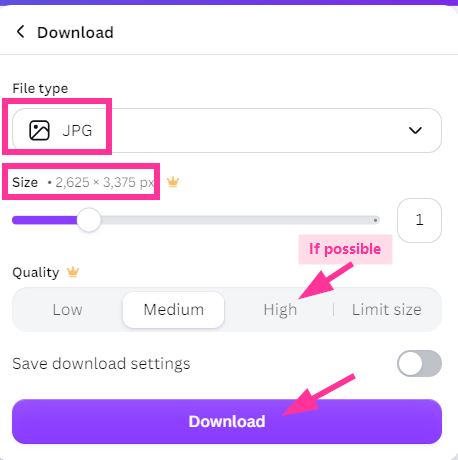 | |
Was this article helpful?
That’s Great!
Thank you for your feedback
Sorry! We couldn't be helpful
Thank you for your feedback
Feedback sent
We appreciate your effort and will try to fix the article