Memento Yearbook's ladder helps keep your book organized. When starting your book, create thematic sections and then add pages inside of them.
Book Manager Overview
Sections Versus Pages
| Sections are used to organize pages into different topics/themes. A new yearbook project will include two sections:
Add as many additional sections to your book as needed to keep it organized. |  |
| Pages are added into section. Pages are initially added as independent single pages. Adjoining pages are displayed with a left- and right-side together, forming a double-page spread. When a double-page spread is divided into separate sections, the "ghost" of the left-side page will be displayed at the front of the next section in preview. Note that the first of your book in the Intro section is a left-side page, with the opposite side displayed as "Printed blank." The last page of your book should be a right-facing page with a blank page next to it. |  |
| When a layout includes a background or frames that overlap the gutter between two pages, the ladder will show a green link on the spread. This link indicates that the pages are locked together. Learn more about ladder management article. |  |
Organizing by sections
Never add all your pages to a single section. Organizing your project and customizing your portrait pages becomes very difficult with all pages in a single section. Sections divide your book by topic and styling, allowing you to review page progress, assign pages to team members, create multi-page proof pdfs and customize portrait pages with ease and confidence.
Suggested sections include:
- Intro: Inside cover, table of contents, "all about me" layout, administrator greetings, book dedication or special tributes
- Staff pages: Staff portrait flows, candids, accolades and retirements
- One section per grade: Portraits flowed into classroom groupings or all students alphabetically. May include candid pages of grade activities or "splash" pages to introduce each section.
- Senior special pages: baby or graduation photos, memories & quotes, favourites/superlatives, prom and graduation ceremony.
- Sports teams & clubs: one or more sections, depending on your page count and the number of groups at your school.
- Special activities: performances, field trips, dances, theme days, etc.
- Ad pages
- Autograph pages
Ladder planning tools: For help deciding which sections to include in your yearbook, download our PDF topic checklist. If you would like to plan your ladder on paper, feel free to download this printable PDF form.
Cover page
When you first access the Edit Book area, you will find a single blank page at the top - the Cover.

| When the cover is first opened in the Editor, you will see a single blank white canvas page. It may have thin or wide red lines around it, indicating the part of the cover that will either be trimmed off (soft cover binding) or wrap around the back (hard cover binding). Backgrounds and banners should extend into this area to ensure full edge-to-edge coverage. The spine area is indicated with red lines in the middle of the page. Place text in this area but keep it sized quite small and perfectly centered. Be sure to ask your publisher for their spine text recommendations for your binding and page count.
| 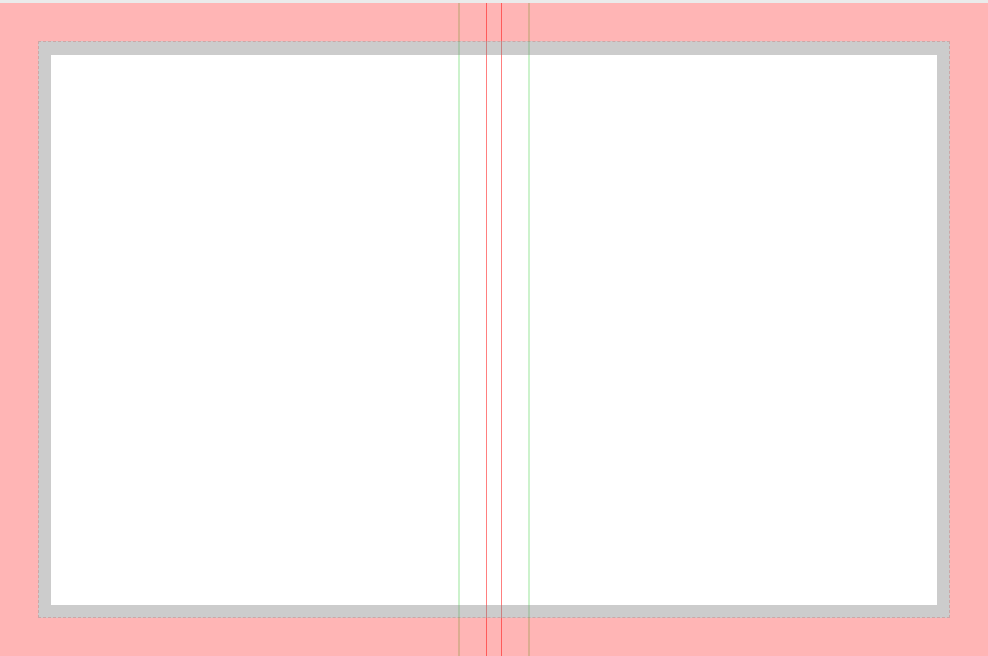 |
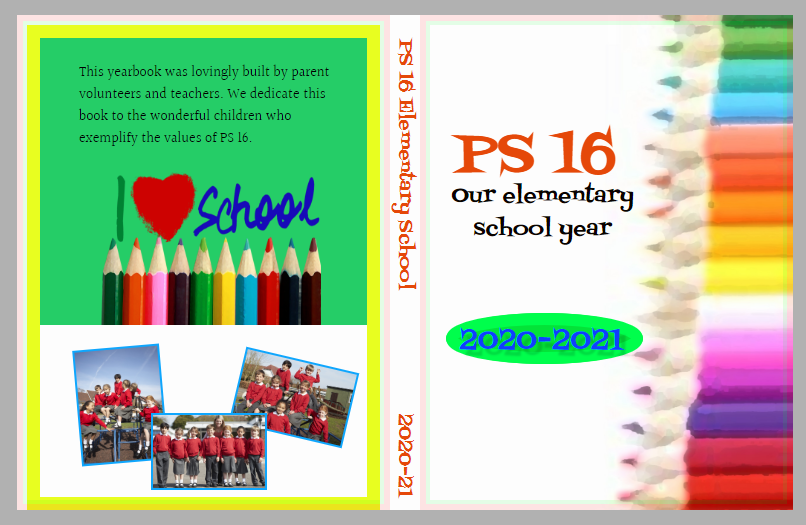 | The back cover is designed on the left side of the page, and the front cover is designed on the right side. Design the cover as if the book was lying flat opened on a table. When designing your cover, be sure to either flow a continuous texture over the spine area, or keep backgrounds and photos at least 0.25" from the spine guidelines. This ensures that your book will have a nice clean coverage over the spine. |
 |
Note: Your studio may have placed their logo on the back cover. This may not be moved, covered or removed.
Was this article helpful?
That’s Great!
Thank you for your feedback
Sorry! We couldn't be helpful
Thank you for your feedback
Feedback sent
We appreciate your effort and will try to fix the article